Find your way around
Learn what’s on Waitly’s Home page and where each page in the Waitly menu takes you.
Before you start
- Waitly is installed.
- 1
Open Waitly from your Shopify admin
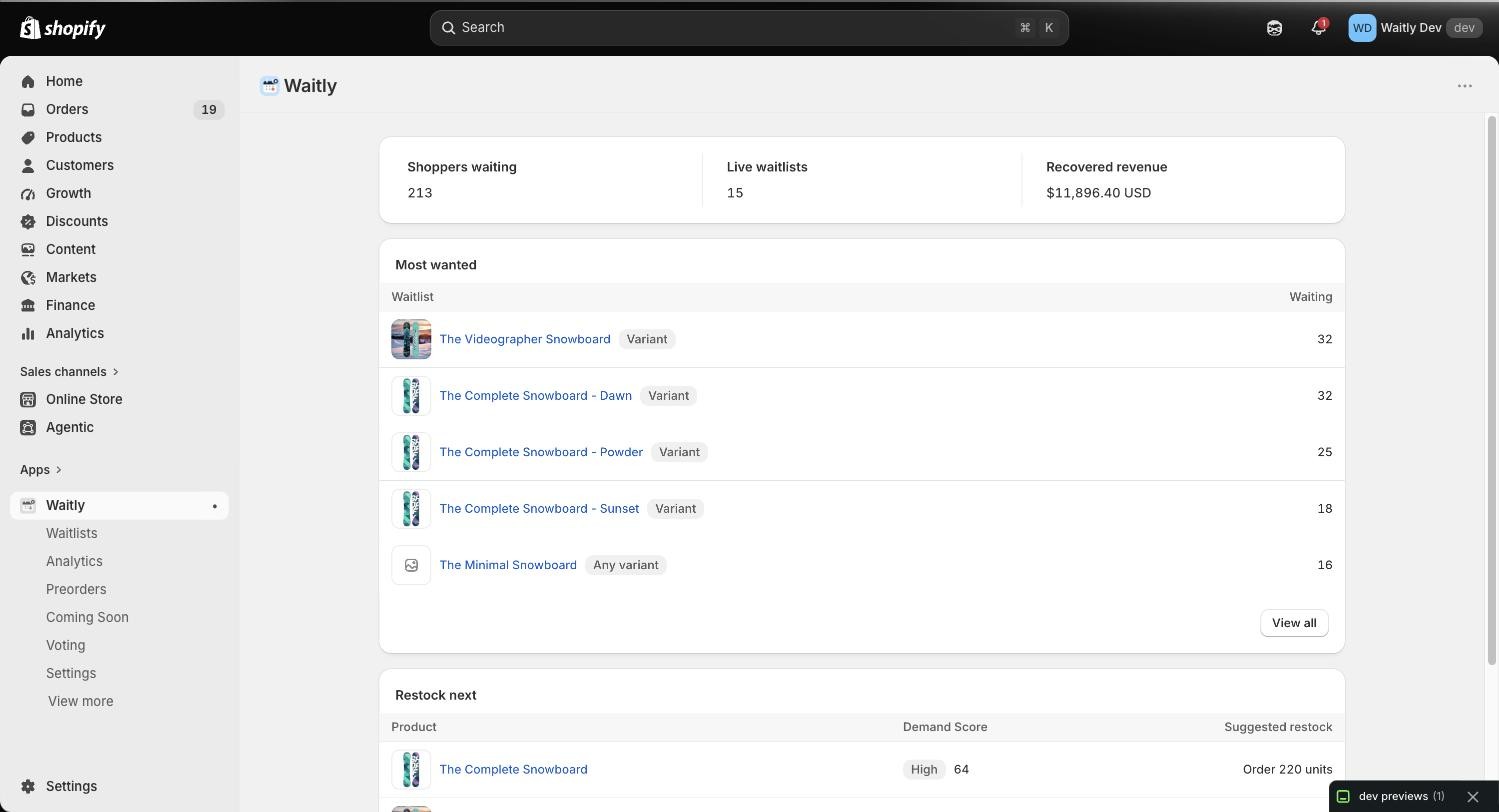
In the left sidebar of your Shopify admin, under Apps, select Waitly. Waitly always opens on Home, and selecting the name Waitly takes you back there from any page.
Shopify admin · Waitly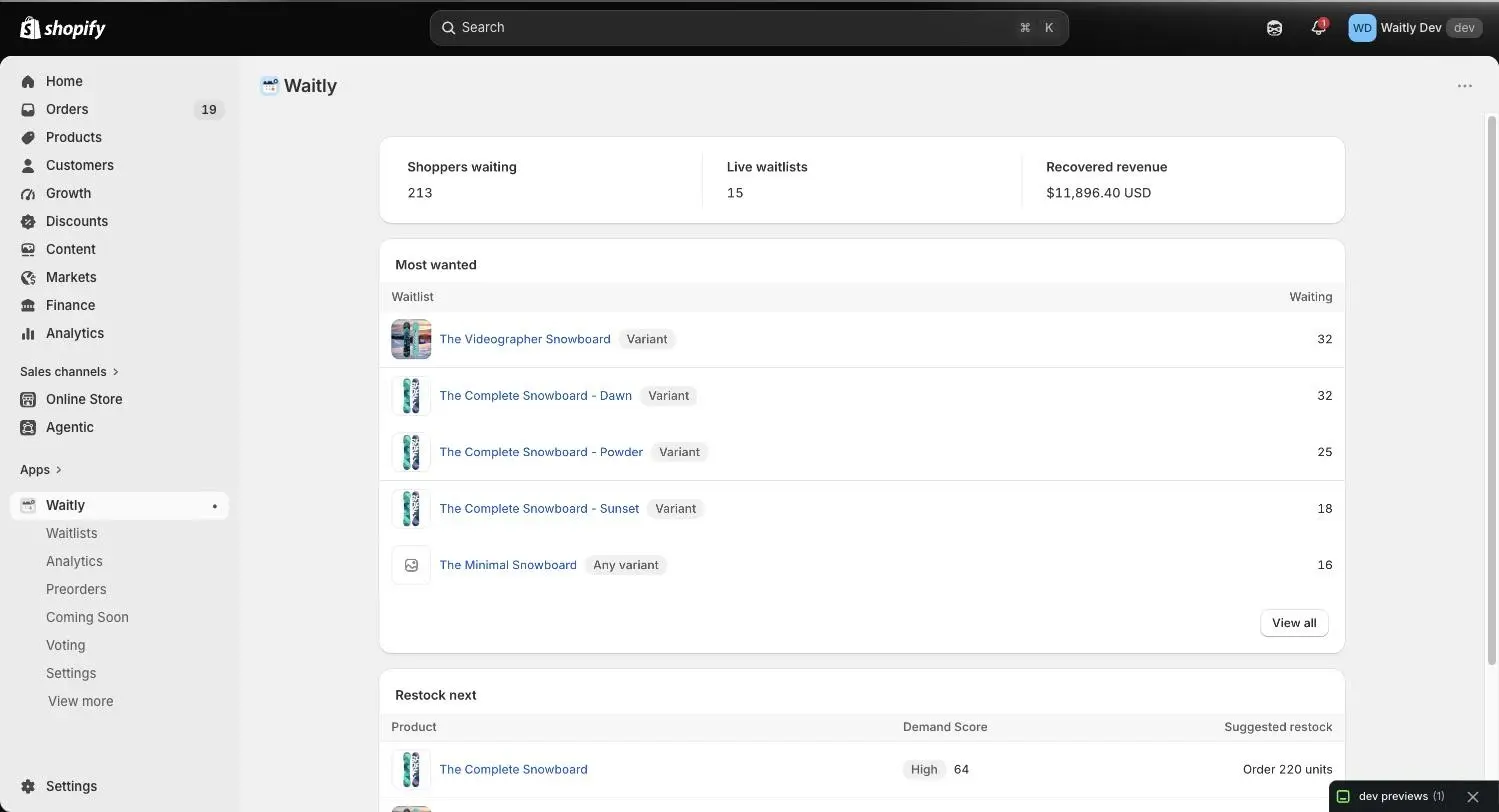
- 1Select Waitly
- 2
Work through the setup guide
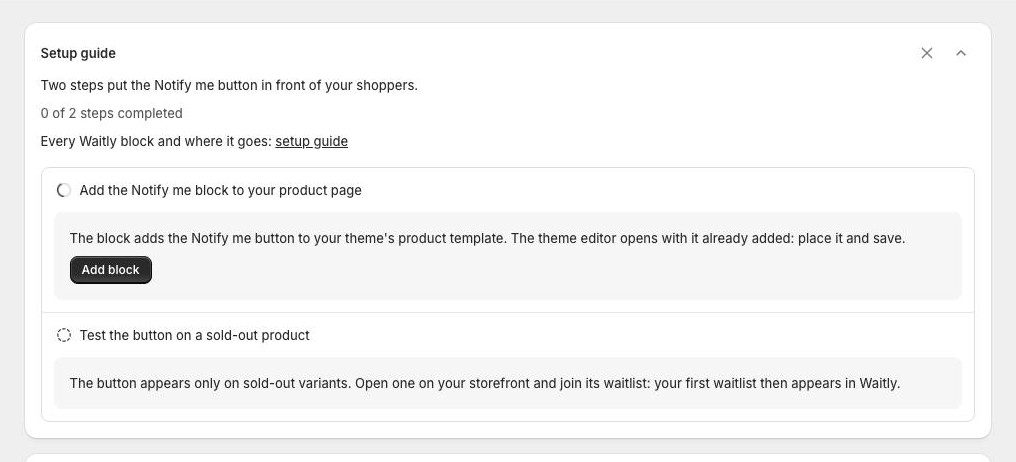
The Setup guide at the top of Home shows how many of its two steps are done: add the Notify me block to your product page, then test the button on a sold-out product. Waitly ticks each step off by itself when it sees the block on your live theme and your first signup.
Use the arrow button to collapse the guide, or the X button to dismiss it. It disappears once both steps are done.
Shopify admin · Waitly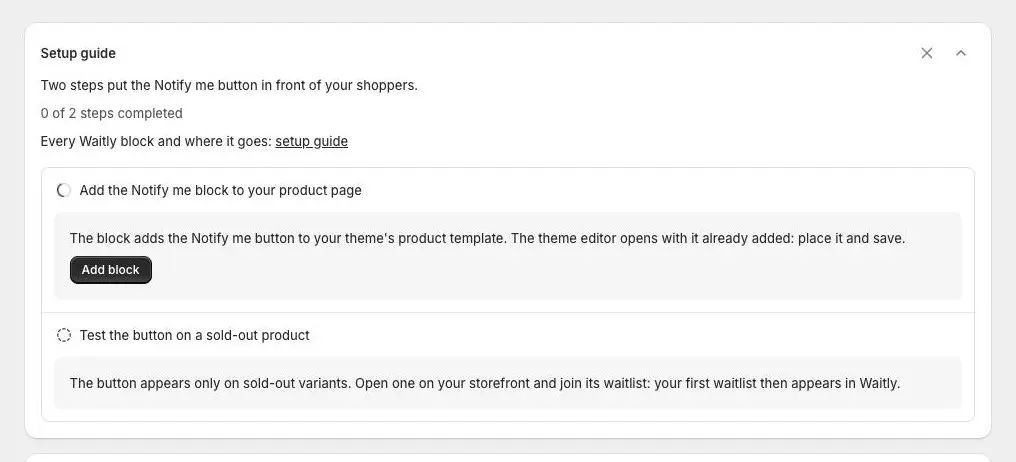
- 1How many steps are done
- 2The two steps
- 3Dismiss or collapse the guide
Note: Dismissing the guide only hides it in this browser. On another computer it shows again until both steps are done.
- 3
Read your numbers
Under the guide, Shoppers waiting counts everyone still waiting for a product, and Live waitlists counts the products and variants with at least one shopper waiting or still deciding after an alert. Select either to open Waitlists.
Recovered revenue is the money from orders placed after a Waitly alert. It’s on Growth and Pro; on Free it shows Growth and an Upgrade to Growth link.
Shopify admin · Waitly
- 1Money from orders after an alert
- 4
See what’s most wanted
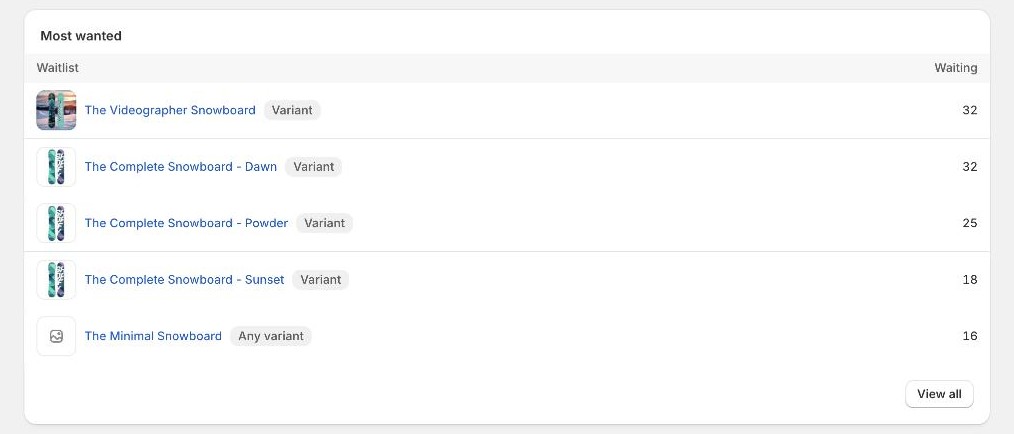
Most wanted lists the five waitlists with the most shoppers waiting. Select a product to open its waitlist, or View all to see every waitlist.
A Variant badge means shoppers are waiting for that one size or color. Any variant means they’ll take whichever variant comes back first.
Shopify admin · Waitly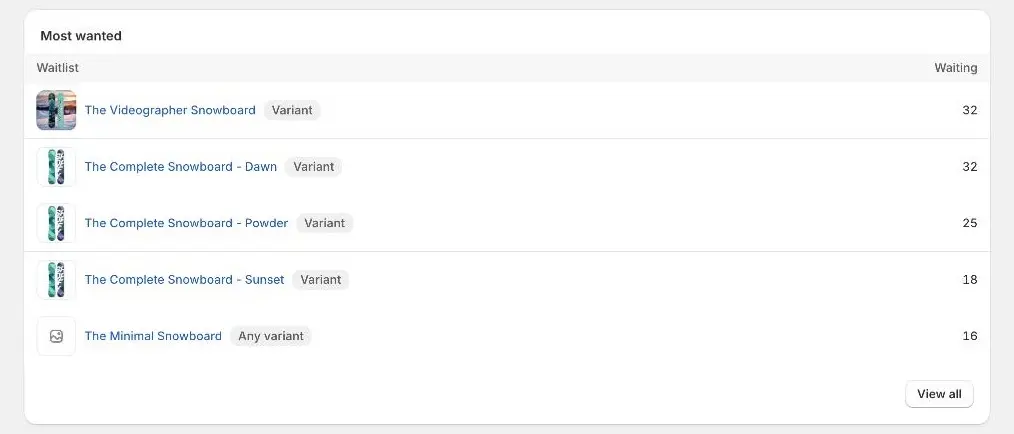
- 1Open its waitlist
- 2See every waitlist
- 5
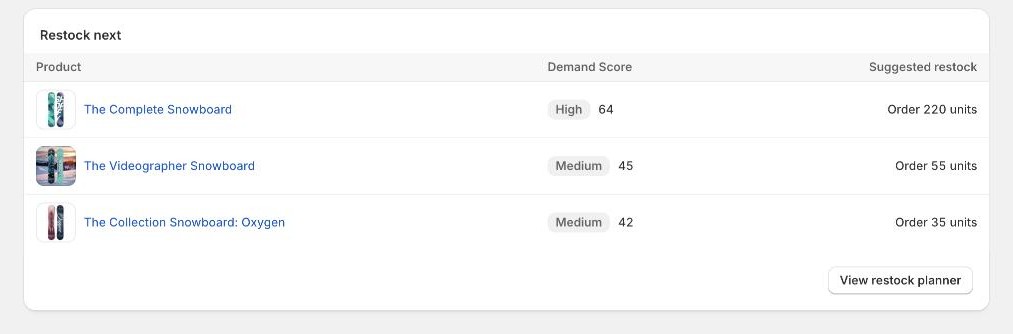
Check Restock next on Pro
On Pro, Restock next sits under Most wanted. It lists the products shoppers want most by Demand Score, with a Suggested restock for each. View restock planner opens the full list.
The card only appears when there’s something to restock.
Shopify admin · Waitly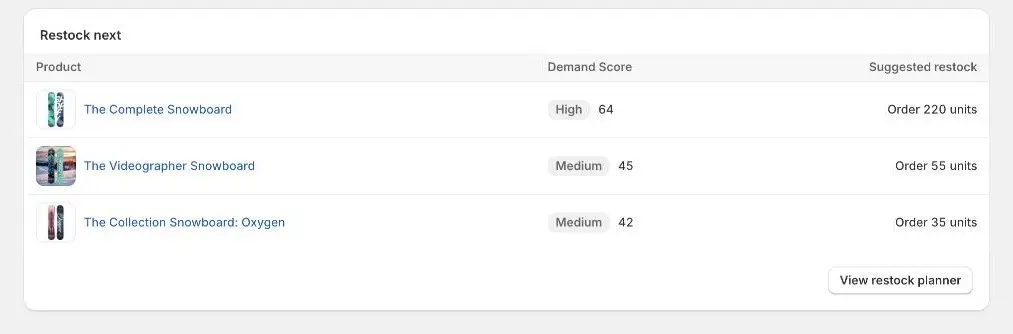
- 1How many units to order
- 2View restock planner
- 6
Use the Waitly menu
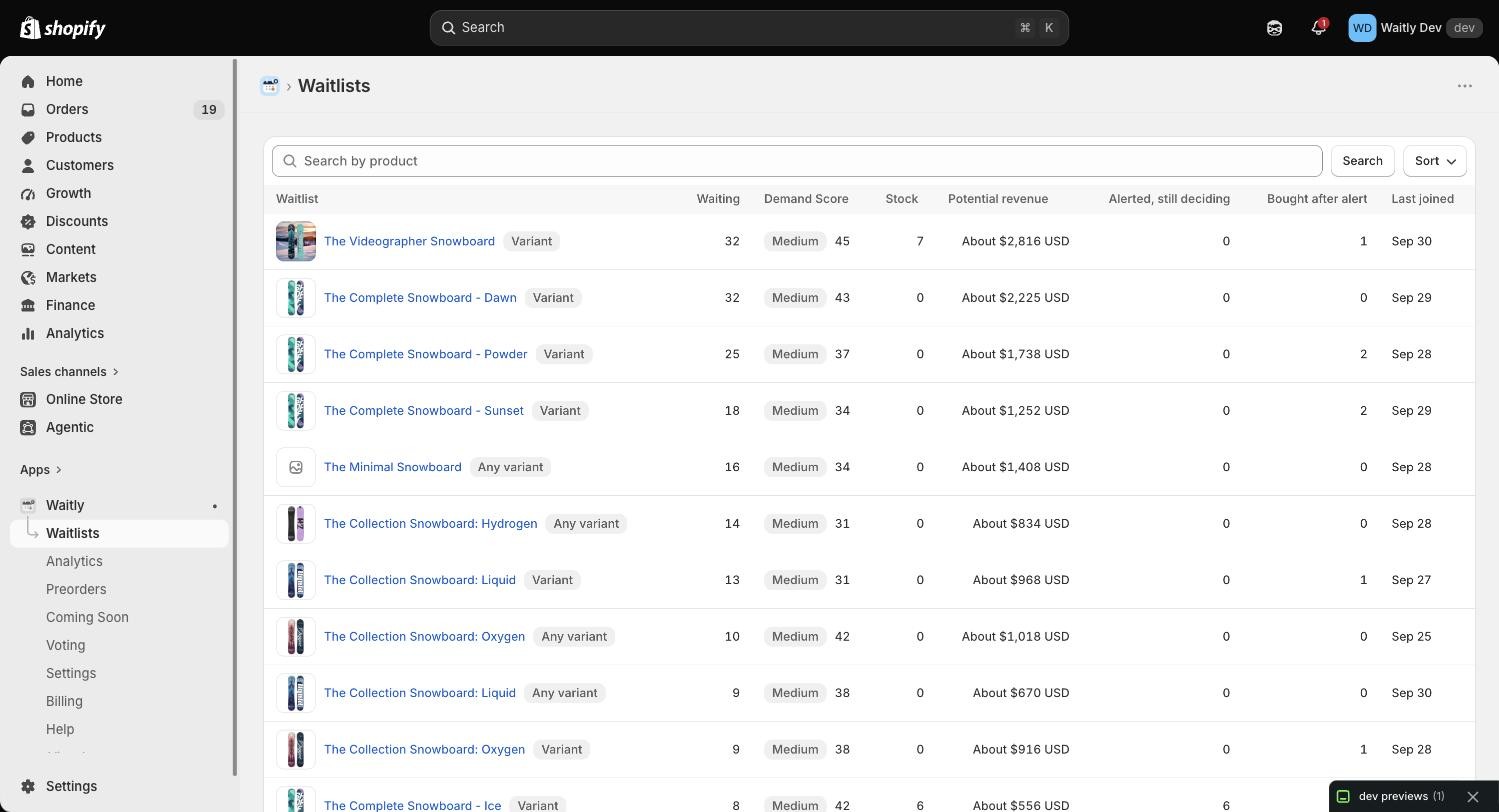
The Waitly menu in your Shopify admin sidebar takes you to every other page. If only some pages are listed, select View more to see the rest:
Waitlists: every product shoppers are waiting for, and who’s on each list. Analytics: what Waitly recovered, demand over time and the log of restock alerts sent. Preorders: your preorder policies and the preorders shoppers placed.
Coming Soon (Pro): products you’ve marked as not for sale yet. Voting (Pro): product ideas shoppers can vote on. Settings: the Notify me block’s connection, notification rules, emails and restock release. Billing: your plan and how much of this cycle’s allowance you’ve used. Help: a form to send a message to Waitly support.
Shopify admin · Waitly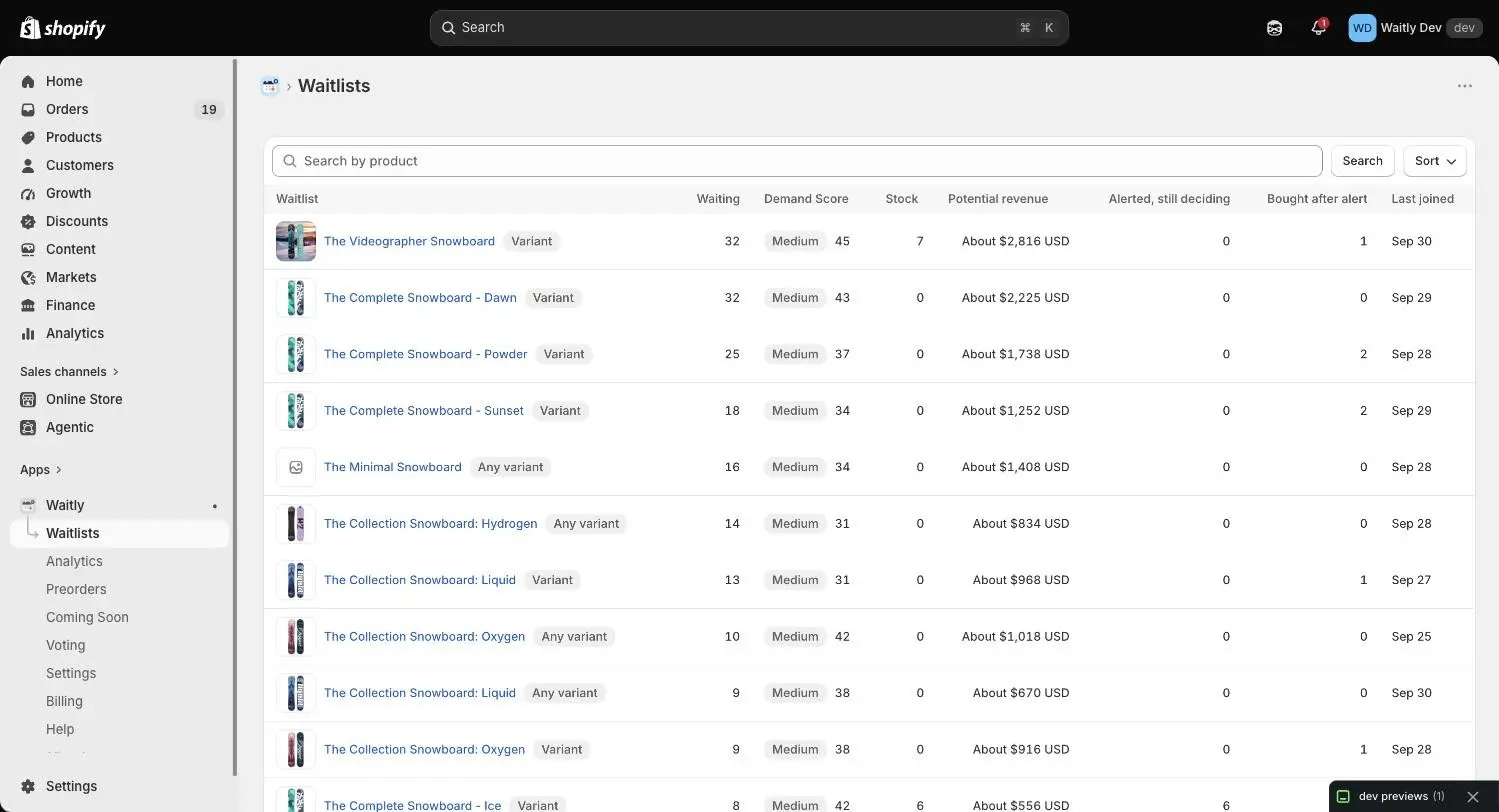
- 1Every Waitly page

Questions
- Why can I see Coming Soon and Voting on the Free plan?
- Every page is in the menu on every plan, so you can see what each one does. Pages and figures your plan doesn’t include are shown with the plan that adds them and an upgrade link.
Read next
- Add the Notify me blockPut the Notify me button on your product page from the setup guide, or add it yourself in the theme editor.
- See who’s waiting for a productOpen one product’s waitlist, read its totals and cards, and see every shopper on it and what happened to them.
- Read your analyticsSee how many shoppers are waiting, what your alerts recovered, and how the rest of the demand ended.