Change the Notify me block’s words and style
Edit the Notify me block’s text, button colors and corners in the theme editor, and on Growth its background, border and button style.
Before you start
- The Notify me block is on your product page.
- 1
Open the block in the theme editor
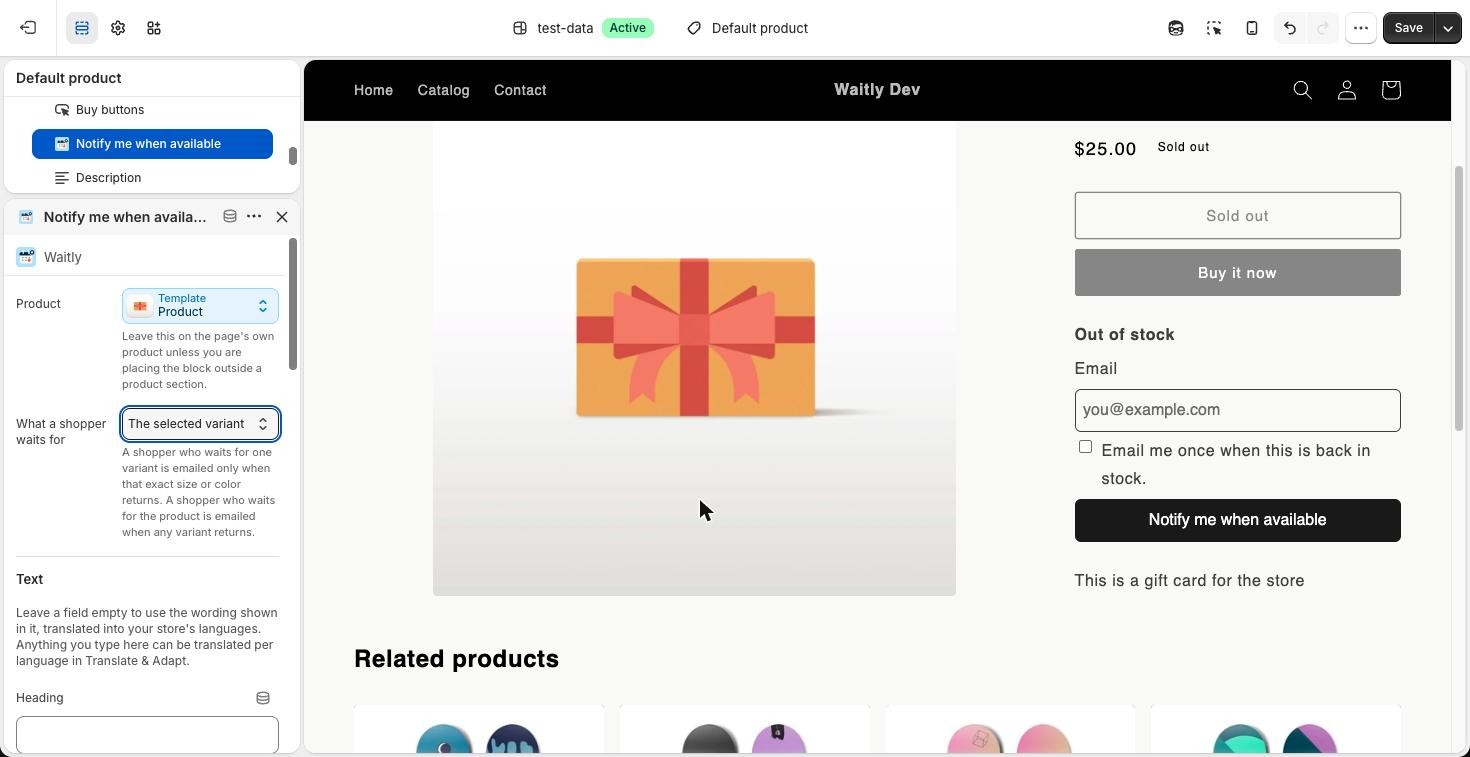
In your Shopify admin, go to Online Store › Themes and select Customize. Choose Products › Default product from the menu at the top, then select Notify me when available in the block list on the left. Its settings open in the sidebar.
Every change shows in the preview straight away. Waitly doesn’t keep a second copy of these settings, so the theme editor is the only place to change them.
Shopify admin · Waitly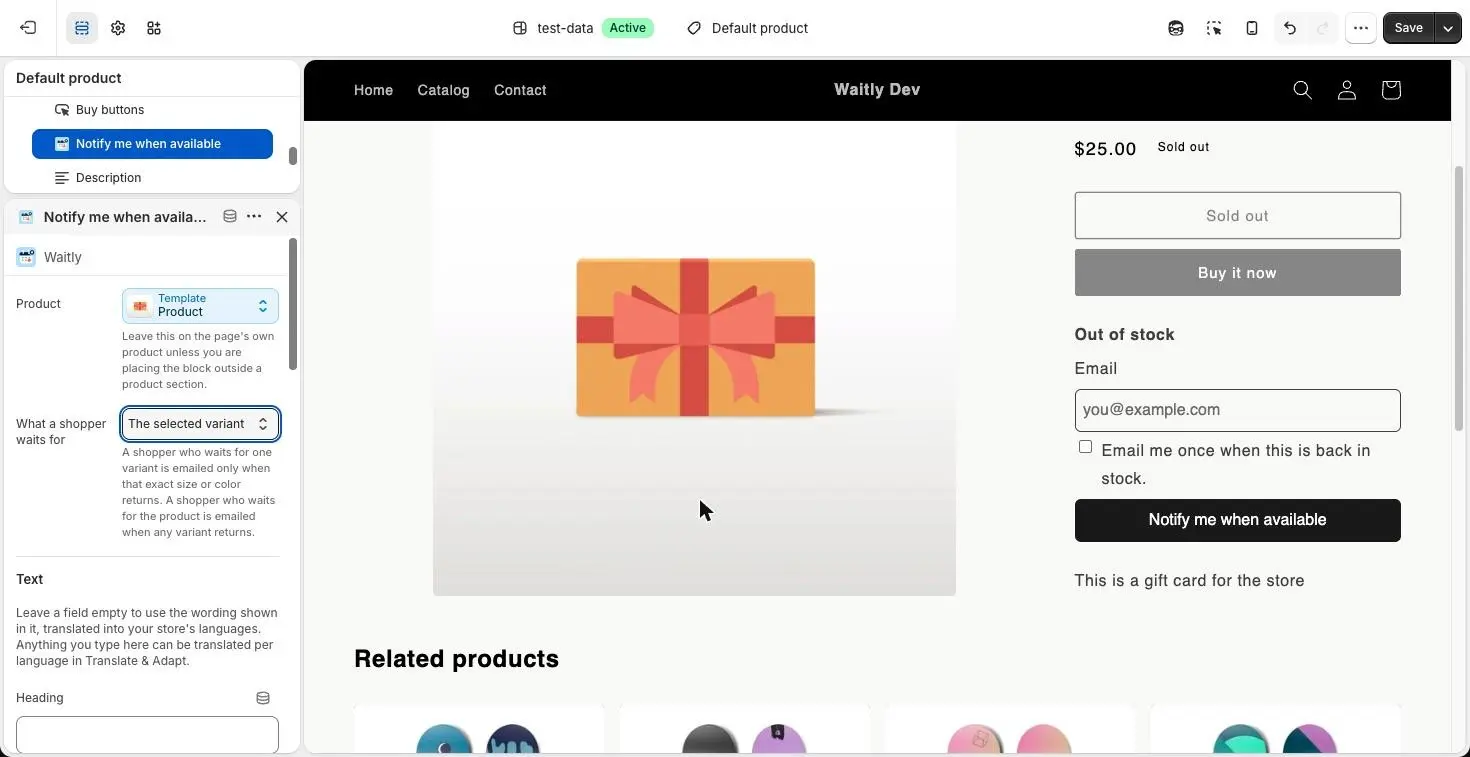
- 1Select Notify me when available
- 2The block’s settings
- 3Changes show in the preview
Tip: The form only shows on a sold-out variant. Use the product picker at the top of the editor to preview a sold-out product, so you can see your changes.
- 2
Change the words
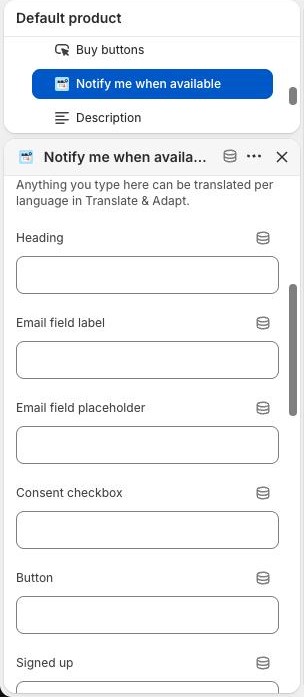
Under Text you can change everything the form says: Heading, Email field label, Email field placeholder, Consent checkbox and Button.
You can also change the messages a shopper sees after pressing the button: Signed up, Email rejected, Too many sign-ups and Something went wrong. No variant chosen shows in place of the form when the options a shopper picked don’t match a real variant.
Every field starts empty. Leave a field empty to keep Waitly’s wording, which you can see in the preview. Waitly’s own wording is in English.
Shopify admin · Waitly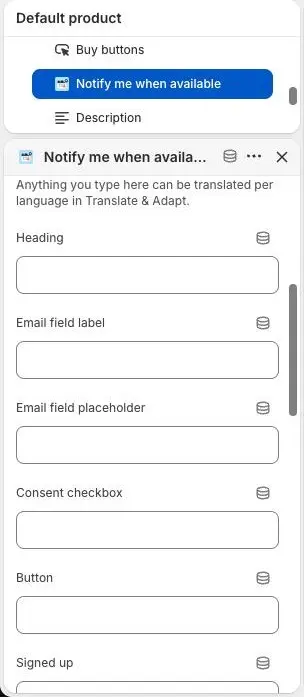
- 1The words on the form
Note: Anything you type here can be translated per language in Shopify’s Translate & Adapt app.
- 3
Set the button colors and corners
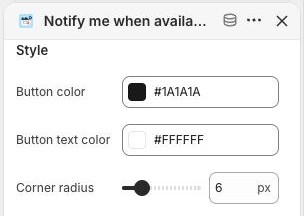
Under Style, choose a Button color and a Button text color, and set the Corner radius from 0 to 32 px. These three settings work on every plan.
Shopify admin · Waitly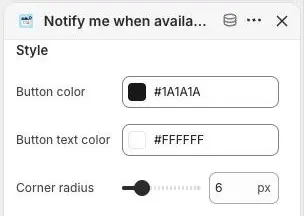
- 1Button colors
- 2Corner radius
- 4
Use the Growth style settings
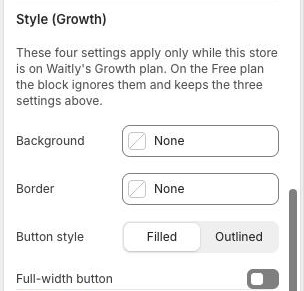
Under Style (Growth) there are four more settings: Background and Border colors for the whole form, Button style (Filled or Outlined) and Full-width button.
They only take effect while your store is on Growth or Pro. On Free the block ignores them and keeps the three settings above.
Shopify admin · Waitly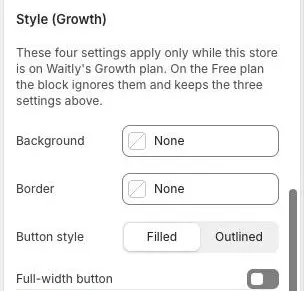
- 1Colors for the whole form
- 2Button style and width
- 5
Save and check your store
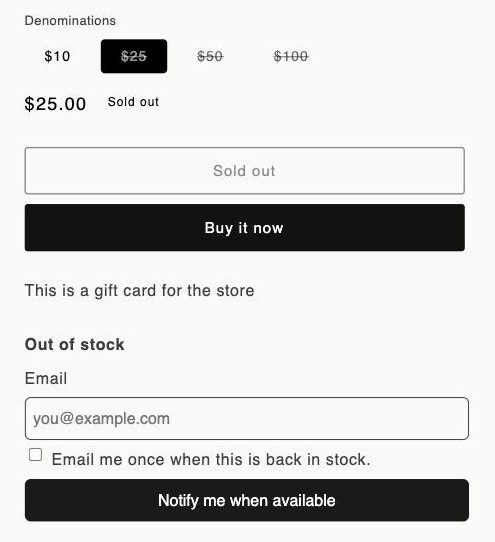
Select Save, then open a sold-out variant on your storefront to see the result.
On Free, a small “Powered by Waitly” line shows under the form. Growth and Pro remove it.
Your online store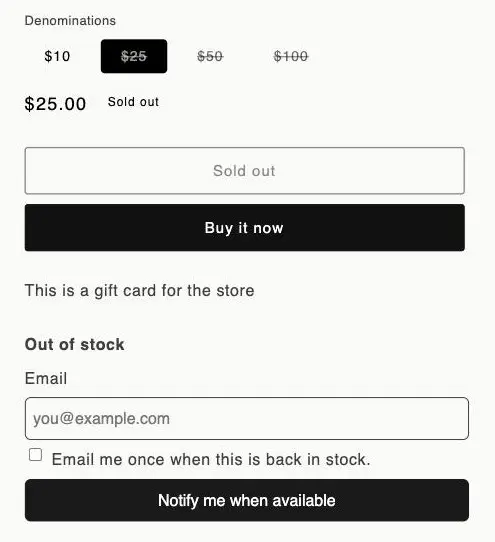
- 1The Notify me form
Questions
- How do I remove “Powered by Waitly”?
- Move to Growth or Pro. The line disappears by itself; there’s no setting to change. Waitly’s Settings page, under Widget, says whether your plan includes it.
- When does the “Too many sign-ups” message show?
- When your store has taken an unusual number of signups in the last hour, or when the same email address has signed up many times in an hour. It protects the address every store’s email is sent from.
- What is the Product setting at the top?
- It tells the block which product it belongs to. Leave it on the page’s own product.
Read next
- Wait for a variant or the whole productChoose whether shoppers wait for the exact size or color they picked, or for any variant of the product.
- Add the Notify me blockPut the Notify me button on your product page from the setup guide, or add it yourself in the theme editor.
- Joining a waitlistWhat your shoppers see when they sign up with Notify me, and the confirmation email they get.