Add the voting block to your store
Put the Product voting block on your home page or a page of its own, and word it your way.
ProNeeds the Pro plan.
Before you start
- Your store is on the Pro plan.
- At least one proposal is open, or the block has nothing to show. See “Let shoppers vote on a product idea”.
- 1
Open the theme editor from Voting
In Waitly, choose Voting. Until the block is on your store, a banner reads Add the Voting block to your theme.
Select Open theme editor. Your theme editor opens on your home page with the block ready to add.
Shopify admin · Waitly
- 1Shows until the block is on your store
- 2Select Open theme editor
- 2
Place the block and save
Move the Product voting block to where you want it on the page, then select Save in the theme editor.
To use a page of its own instead, create a page such as “Vote” in Online Store › Pages first. Then open that page in the theme editor and add the Product voting block there.
Shopify admin · Waitly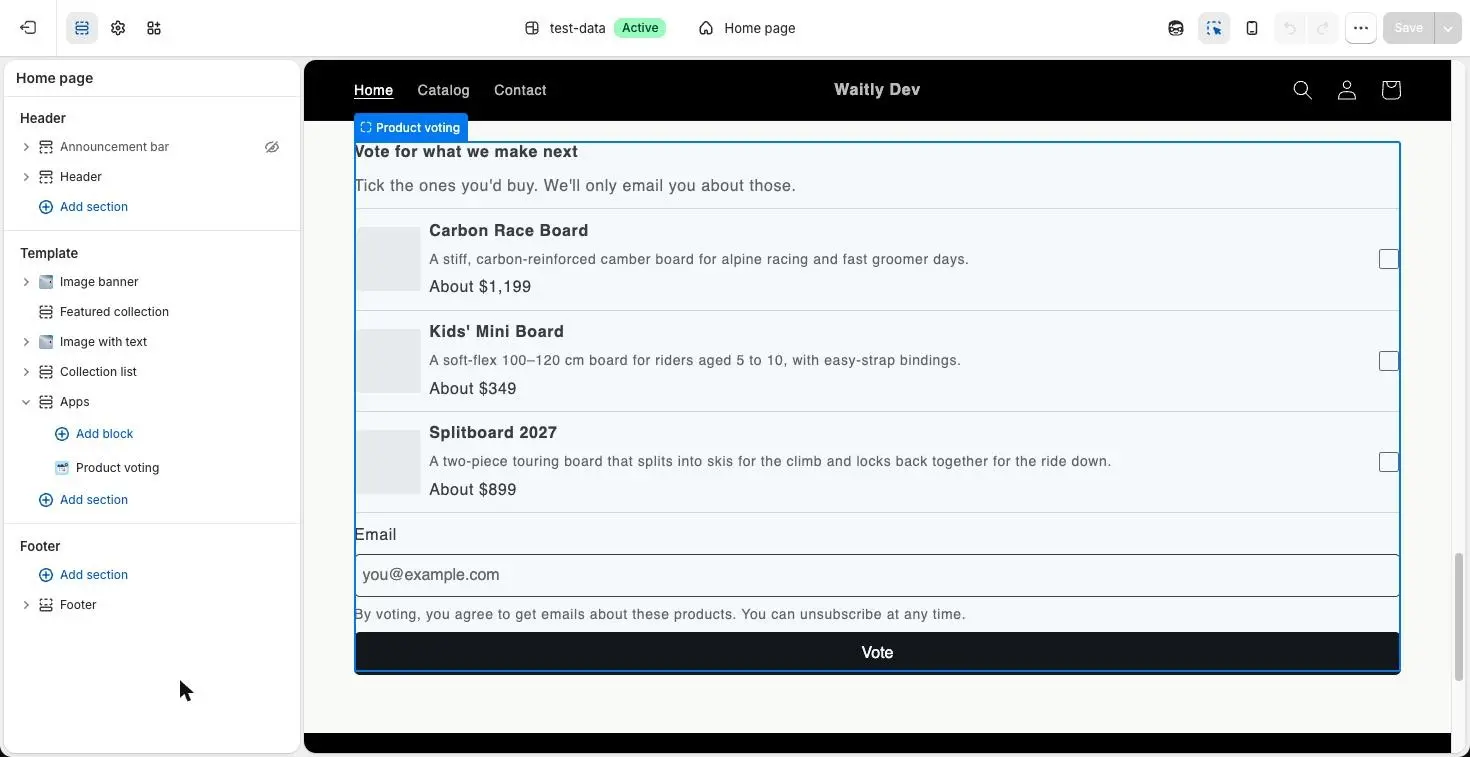
- 1The Product voting block
- 2How it looks on the page
- 3Save the theme
Tip: A block added to a page template shows on every page that uses that template. Give your Vote page its own template if other pages share the default one.
- 3
Change the wording and style if you like
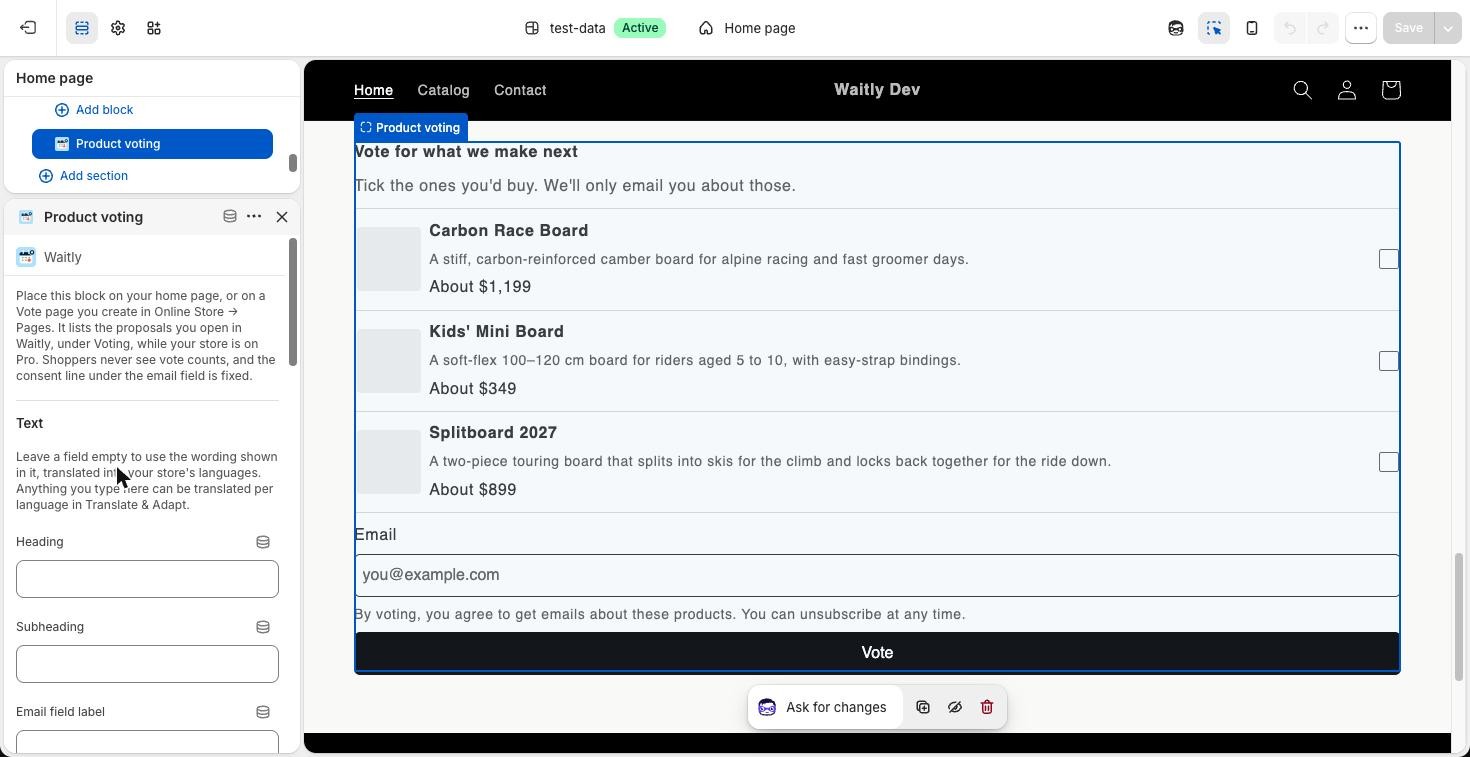
Select the block to see its settings. Under Text you can change the Heading, Subheading, Email field label, Email field placeholder, Button and the messages shoppers see: Voted, Voted before, Voted tag and Nothing ticked. In Voted, {items} stands for the names of the proposals the shopper voted for.
Leave a field empty to use Waitly’s wording, which is in English. Under Style, set the Button color, Button text color and Corner radius; Style (Growth) adds four more settings.
Shopify admin · Waitly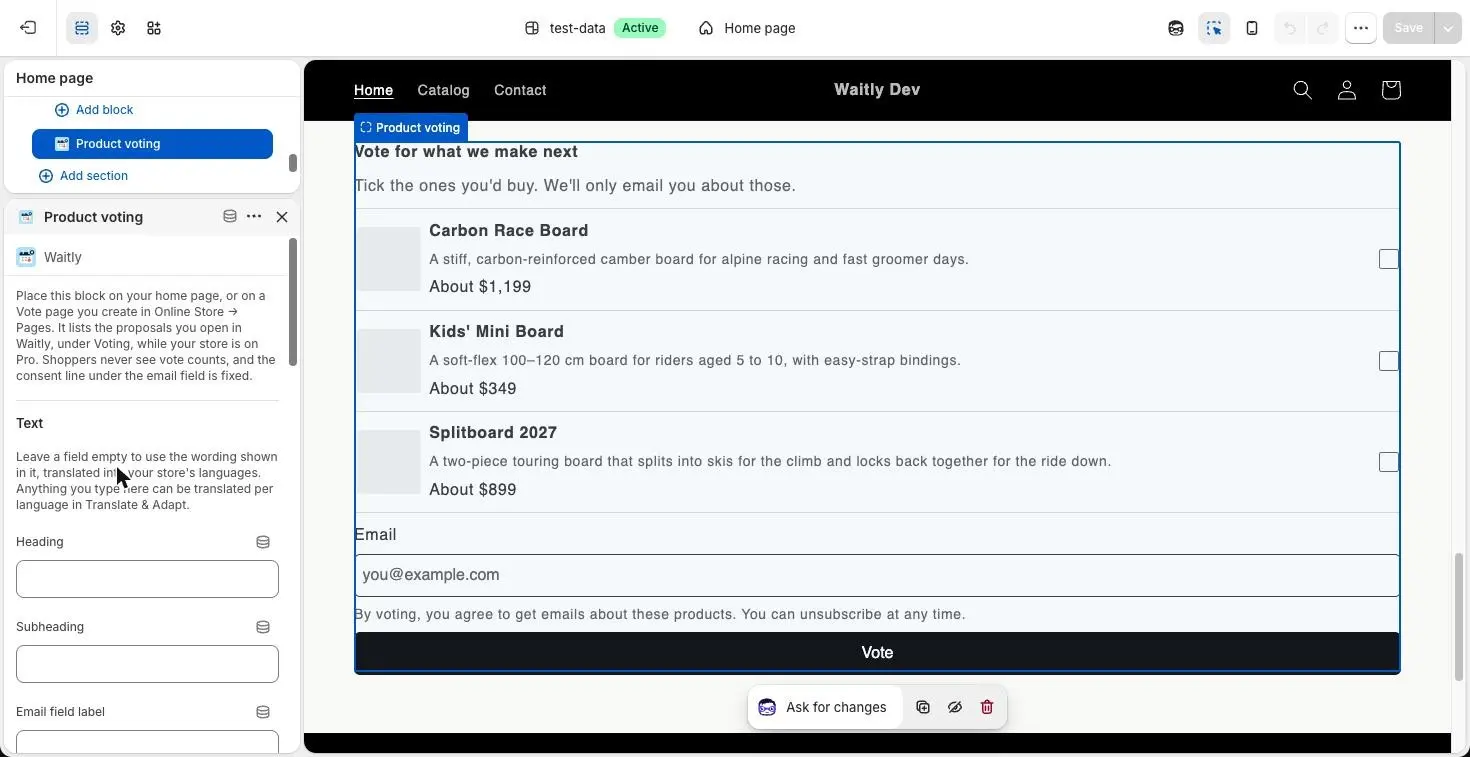
- 1Select the block
- 2Reword the text here
Note: The consent line under the email field can’t be changed. It’s the wording Waitly records as the shopper’s agreement to hear about the products they vote for.
- 4
Check it on your store
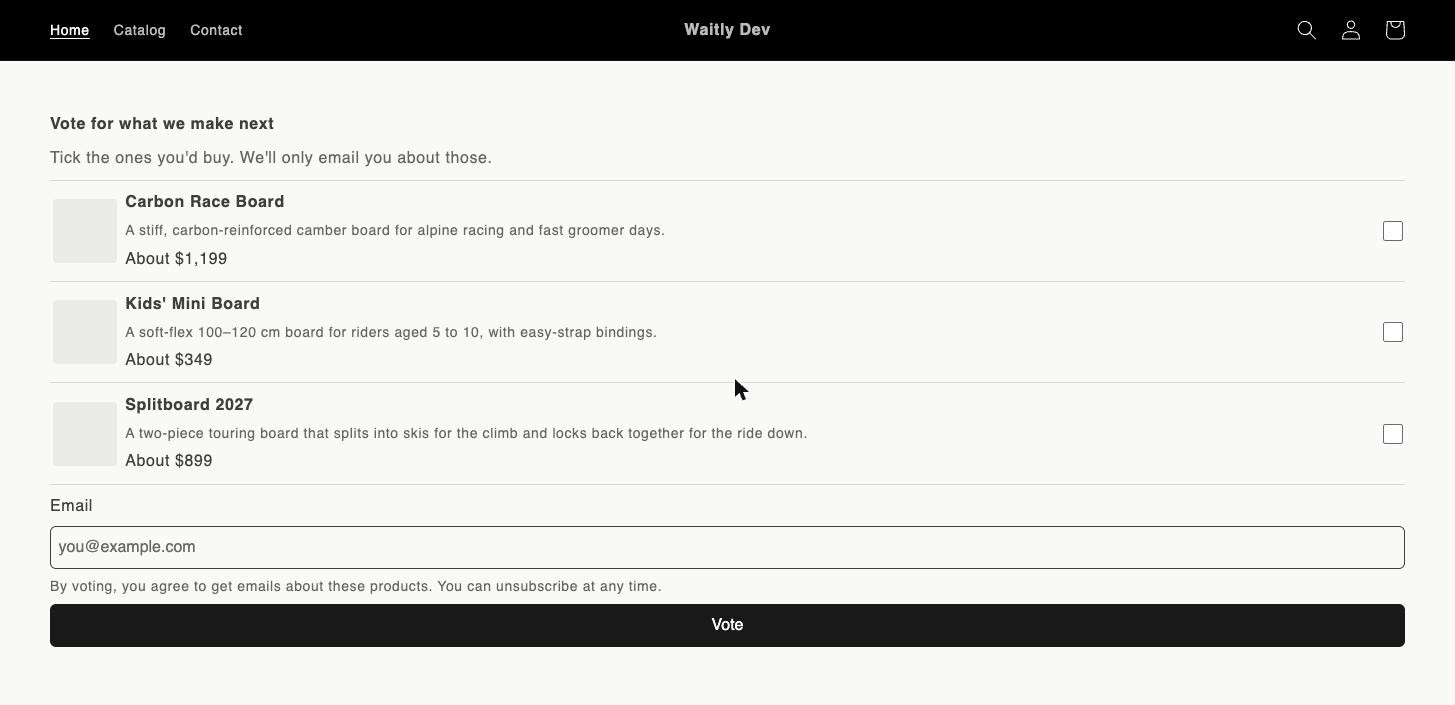
Open the page on your store. The block lists your open proposals, the most recently opened first, each with its image, title, description and planned price. A proposal with no image shows a gray square, as here.
Shoppers tick the ones they’d buy, enter their email and select Vote. They never see how many votes a proposal has.
Your online store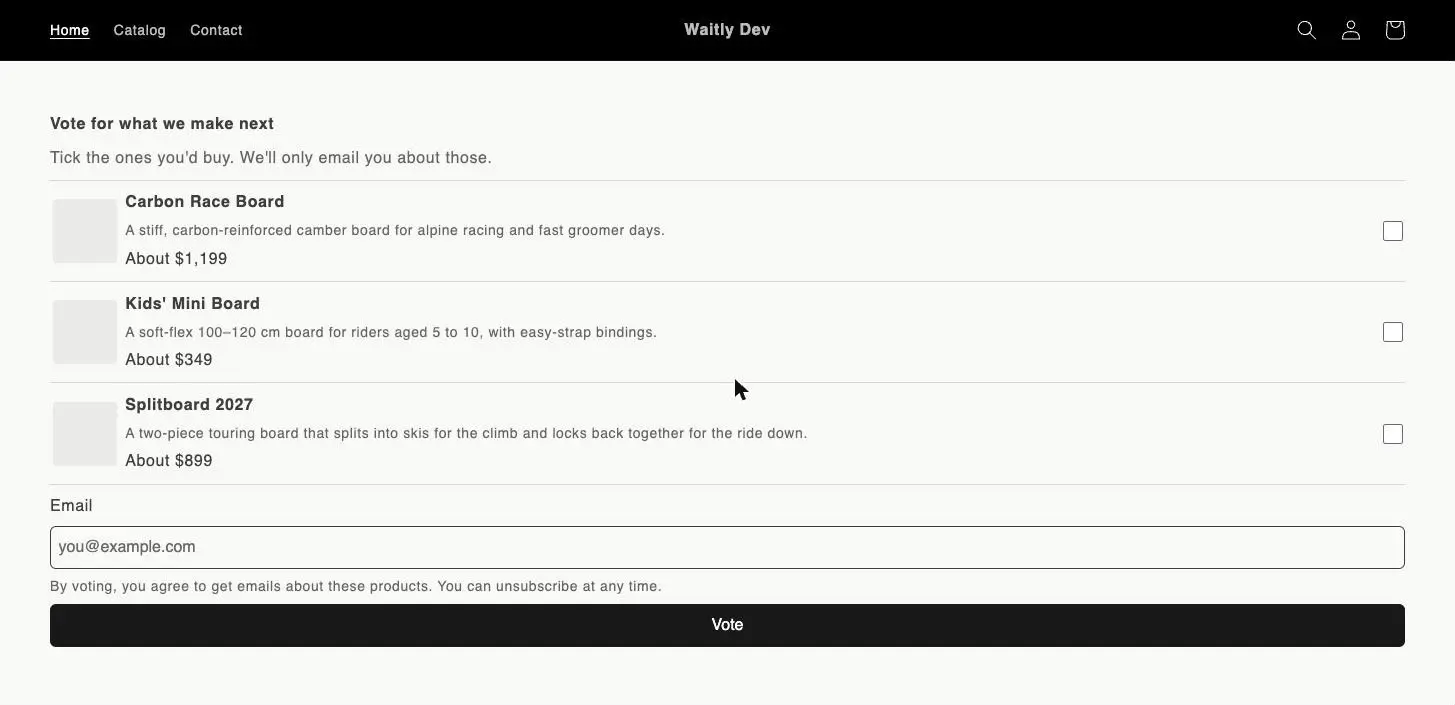
- 1Tick the ones you’d buy
- 2Enter an email
- 3Send the votes

Questions
- Why don’t I see the block on my store?
- It shows only while your store is on Pro and at least one proposal is open. In the theme editor, an empty block says why, so you can still place it.
- Do I need to update the block when I open or close a proposal?
- No. The block always shows whatever is open in Waitly right now.
Read next
- Let shoppers vote on a product ideaDescribe a product that doesn’t exist yet, open it for votes, and close, reopen or delete it later.
- Voting for a productWhat your shoppers see when they vote on your next products, and the thank-you email they get.
- Turn a winning proposal into a productPromote a proposal to a new Shopify product, or link it to one you already have, so every voter hears when it launches.