Write your own email text
Change the subject, heading, message and button of the back-in-stock alert, the launch alert and the waitlist confirmation.
GrowthNeeds the Growth plan or Pro.
Before you start
- Your store is on the Growth or Pro plan.
- 1
Open the Email text section
In Waitly, choose Settings and scroll to Email text. It holds three emails: Back-in-stock alert, Launch alert and Waitlist confirmation.
A badge beside each one reads Using Waitly’s wording, or Customized once you’ve written your own.
Shopify admin · Waitly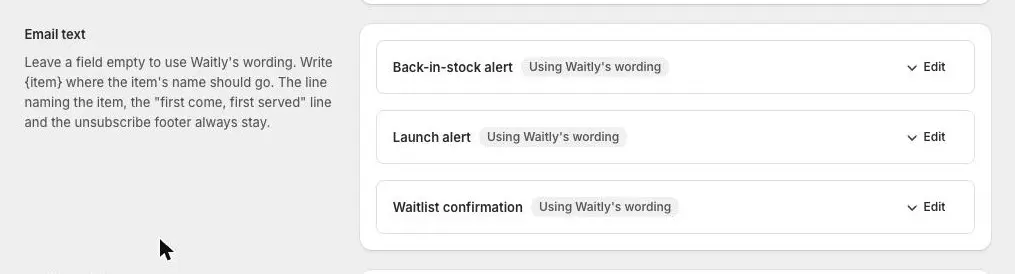
- 1Waitly’s wording or Customized
- 2Open an email’s fields
Note: On the Free plan the button reads Show and the fields can’t be changed. Your emails use Waitly’s wording and end with a “Sent with Waitly” line.
- 2
Open the email you want to change
Select Edit beside an email to open its fields. The button then reads Hide.
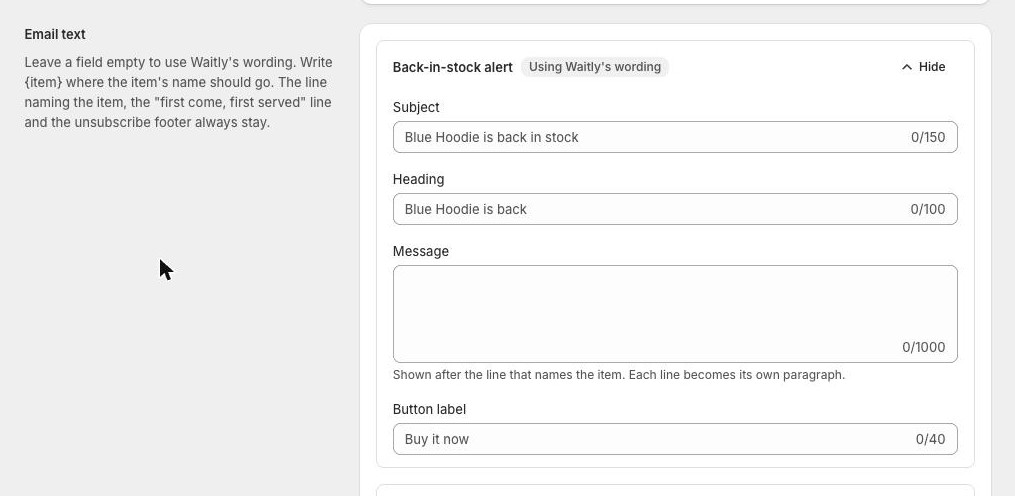
Back-in-stock alert and Launch alert each have Subject, Heading, Message and Button label. The Launch alert goes instead of the back-in-stock alert to shoppers who joined the waitlist of a product you marked Coming Soon.
Waitlist confirmation has Subject, Heading and Message. It has no button, because the item is still sold out when it’s sent.
Shopify admin · Waitly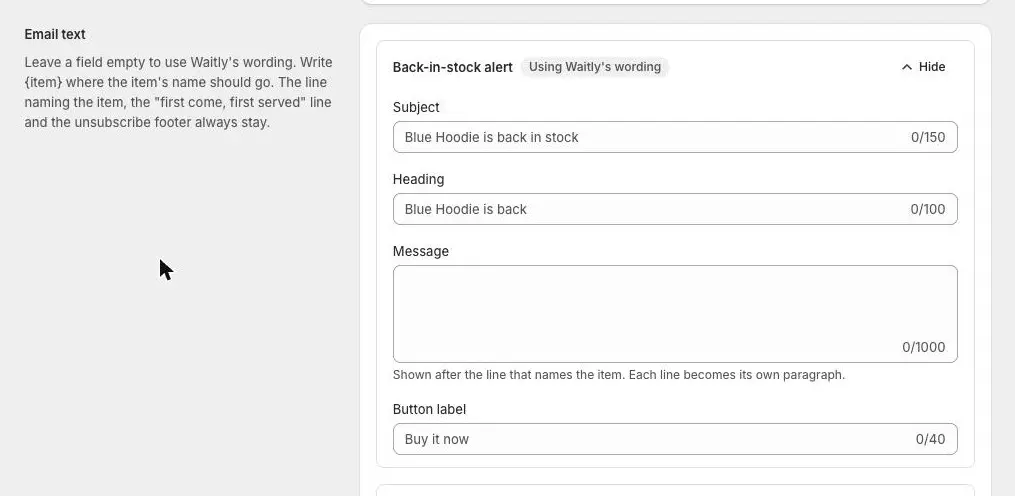
- 1Type your own words
- 2Hide closes the fields
- 3
Write your words
An empty Subject, Heading or Button label shows Waitly’s own wording in gray. In the two alerts, “Blue Hoodie” stands in for the item’s name. Leave a field empty to keep Waitly’s wording, or type your own.
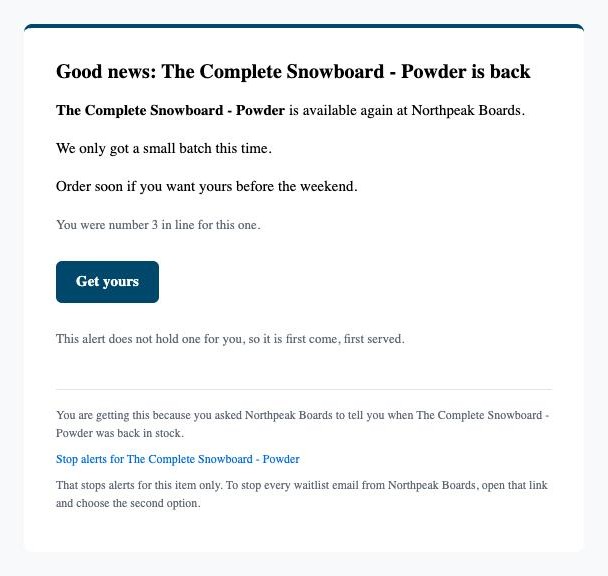
Type {item} where the item’s name should go, for example “Good news: {item} is back”. It fills in with what the shopper is waiting for, such as “The Complete Snowboard - Powder”.
Your Message appears after the line that names the item. Each line you write becomes its own paragraph.
Note: Some lines always stay, whatever you write: the line naming the item, the “first come, first served” line, the shopper’s place in line, and the unsubscribe footer. On Pro, an alert that holds a unit for the shopper uses your heading and message, but keeps Waitly’s subject and its Complete your purchase button.
- 4
Save and see the result
Select Save in the bar at the top of the page. The email’s badge changes to Customized, and the next emails go out with your words around Waitly’s fixed lines.
Shopper’s inbox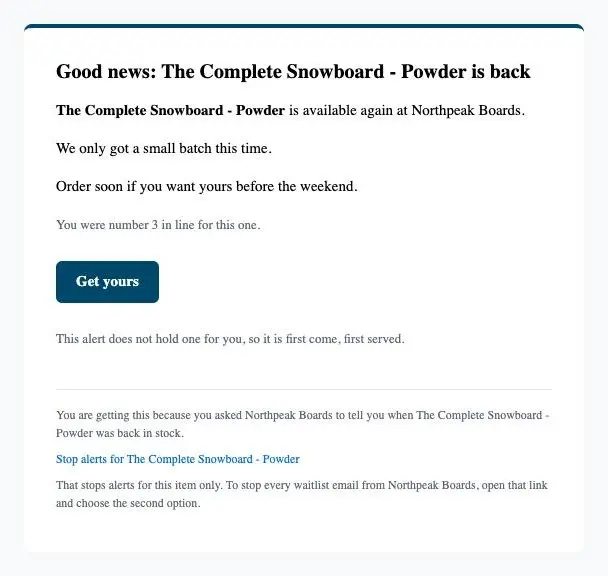
- 1Your heading, with {item} filled in
- 2Your message, one paragraph per line
- 3Your button label
- 5
Go back to Waitly’s wording
To undo your changes, open the email, clear every field in it and select Save. The badge goes back to Using Waitly’s wording.
You can also clear just one field. That part goes back to Waitly’s wording and the rest keeps yours.
Tip: If you move to the Free plan, Waitly keeps your words but stops using them. They come back if you upgrade again.
Questions
- Can I use other placeholders, like my shop name?
- No. {item} is the only one. Type your shop name as plain text.
- How long can each field be?
- Subject up to 150 characters, heading up to 100, message up to 1,000 and button label up to 40. Subject, heading and button label must fit on one line.
- Can I change the preorder or vote emails?
- No. The preorder receipt, delay notices and the vote confirmation always use Waitly’s wording. Your logo and brand color still appear on them.
Read next
- Add your logo and color to emailsSet the sender name and reply-to address, and put your logo and brand color on every email Waitly sends for you.
- The back-in-stock emailWhat your shoppers get when an item they’re waiting for comes back, and what happens after they read it.
- Joining a waitlistWhat your shoppers see when they sign up with Notify me, and the confirmation email they get.