Browse every waitlist
Search and sort all your waitlists on one page, and see which products shoppers want most.
Before you start
- Waitly is installed and at least one shopper has signed up with Notify me.
- 1
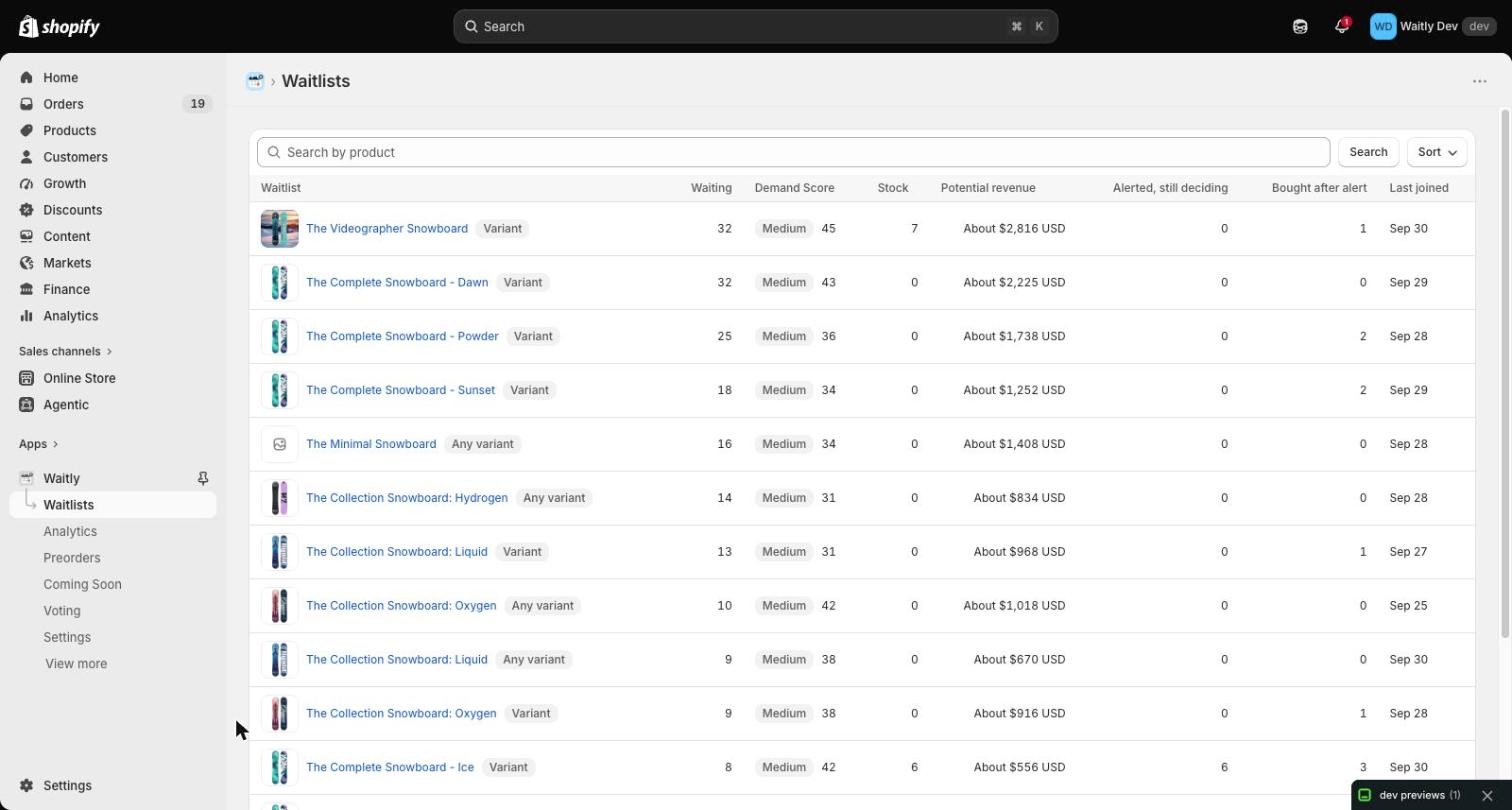
Open Waitlists
In the Waitly menu on the left of your Shopify admin, select Waitlists. You can also select View all under Most wanted on Home.
Each row is one waitlist. A variant and its product are separate rows, so a product with three sold-out sizes can show up three times. The list starts with the waitlists that have the most shoppers waiting.
Shopify admin · Waitly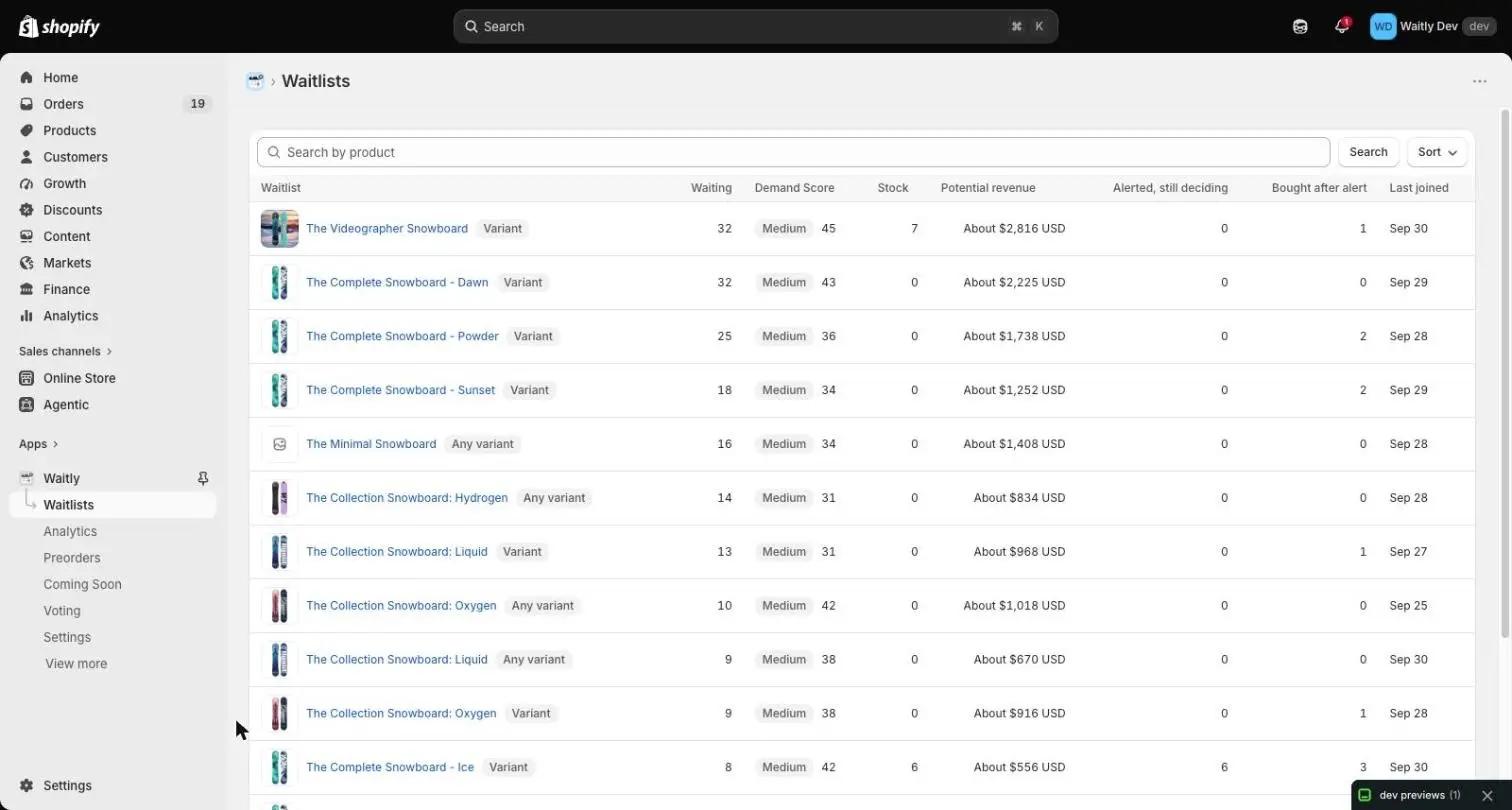
- 1Open Waitlists
- 2
Read the columns
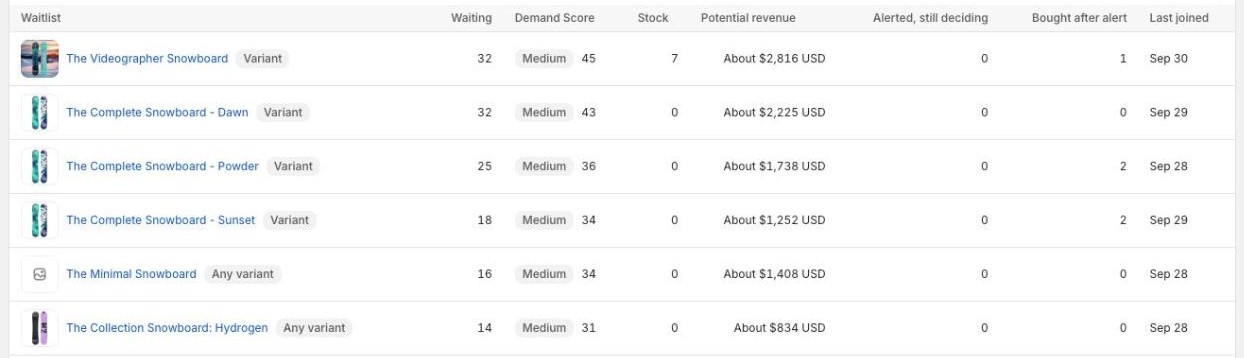
Waitlist shows the product or variant with a Variant or Any variant badge. Any variant means shoppers will take any version of the product. Waiting is how many shoppers are still due an alert.
Alerted, still deciding counts shoppers who got an alert and haven’t bought yet. If they don’t buy within the time set by Hold a restock alert for in Settings, they go back to waiting. Bought after alert counts shoppers who bought after an alert. Last joined is the day the newest shopper signed up.
Shopify admin · Waitly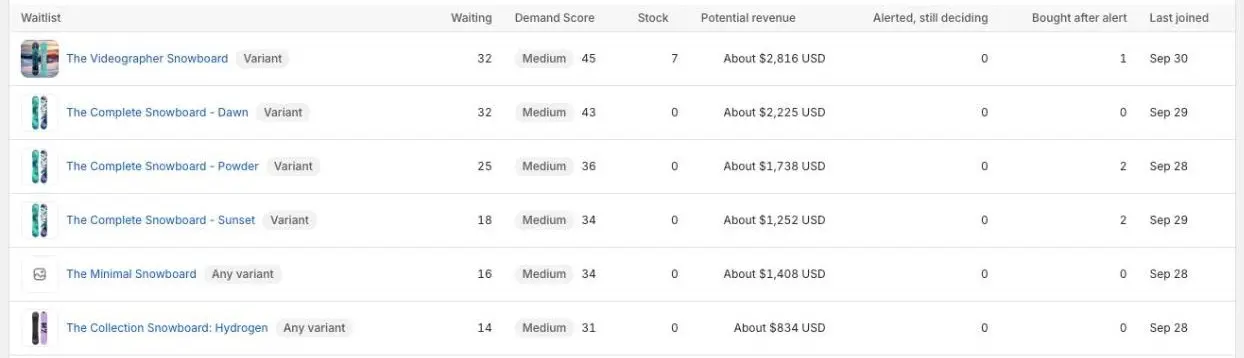
- 1Variant or any variant
- 2Shoppers still due an alert
- 3Pro columns
Note: A Deleted in Shopify badge means the product is no longer in your store. Its row stays so you can still see its history.
- 3
Read the Pro columns
On Pro, three more columns fill in. Demand Score rates from 0 to 100 how strongly shoppers want the item. Stock is what Shopify last reported; a minus number means it’s oversold. Potential revenue estimates what the shoppers waiting could spend if the item came back, based on how often your alerts have led to a sale.
Potential revenue shows a dash until your store has sent 100 restock alerts. Point at the column header to see how many have gone out so far.
Note: On Free and Growth these columns show a dash with a Pro badge on the header, and a banner at the top of the page explains what Pro adds.
- 4
Search for a product
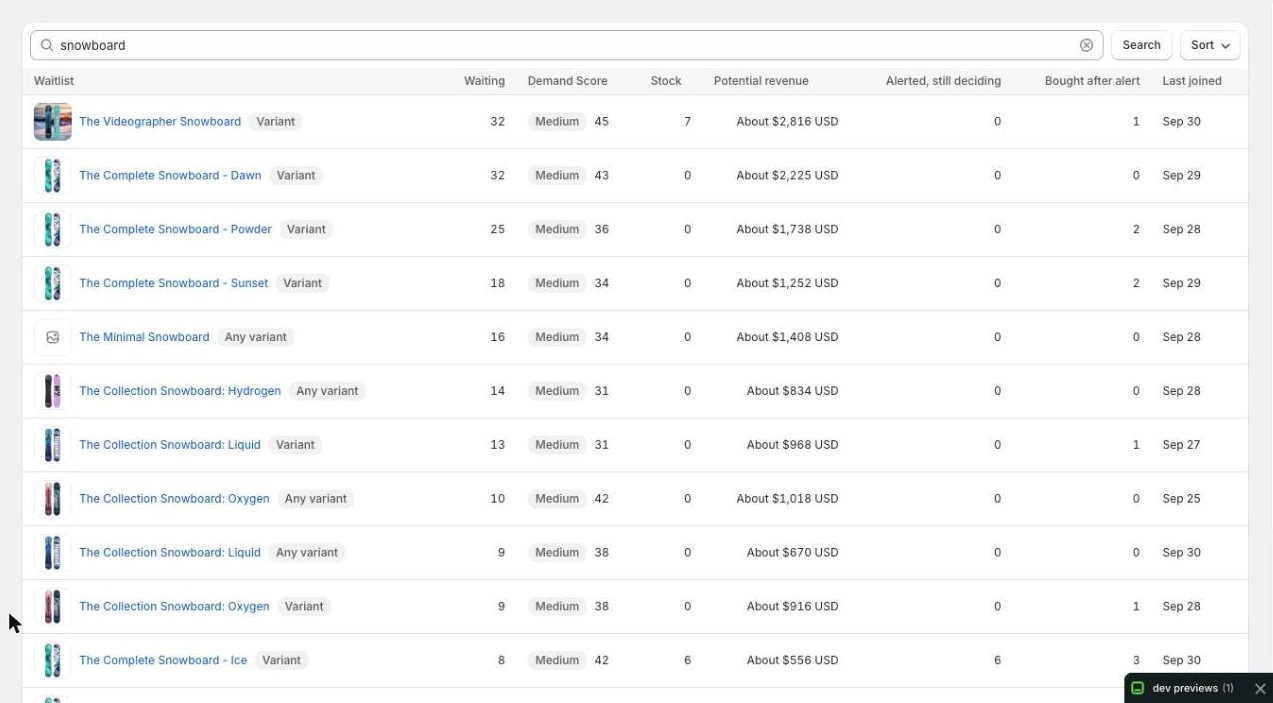
Type part of a product’s name in Search by product and select Search. The list narrows to that product’s waitlists.
If nothing matches, select Clear search to see every waitlist again.
Shopify admin · Waitly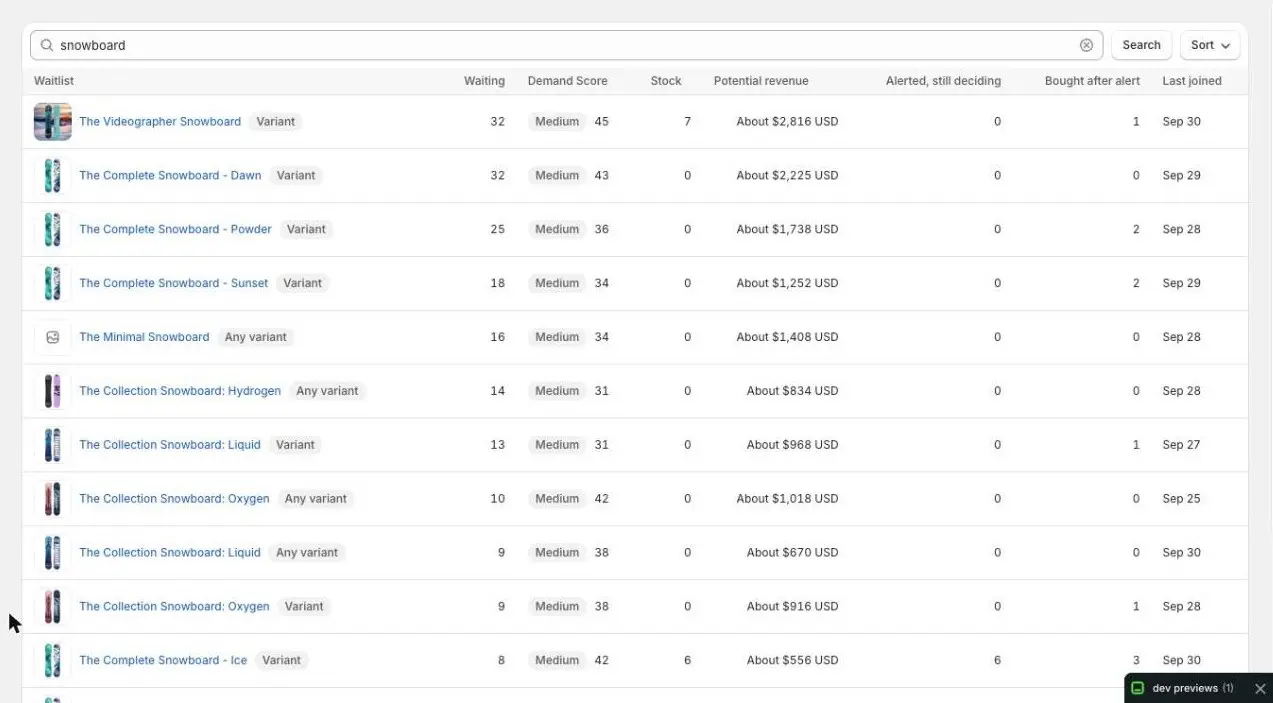
- 1Search by product name
- 5
Change the order
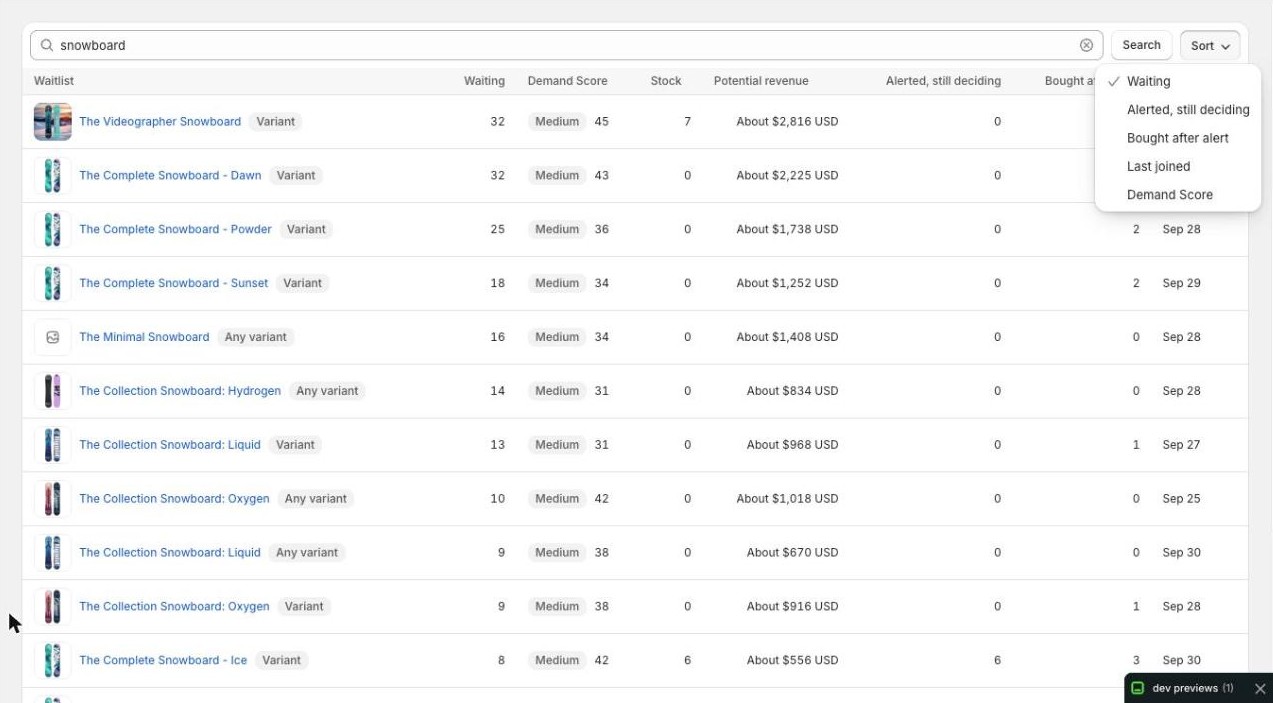
Select Sort and choose Waiting, Alerted, still deciding, Bought after alert or Last joined. On Pro you can also sort by Demand Score to see what to restock first.
Your search stays in place when you change the order.
Shopify admin · Waitly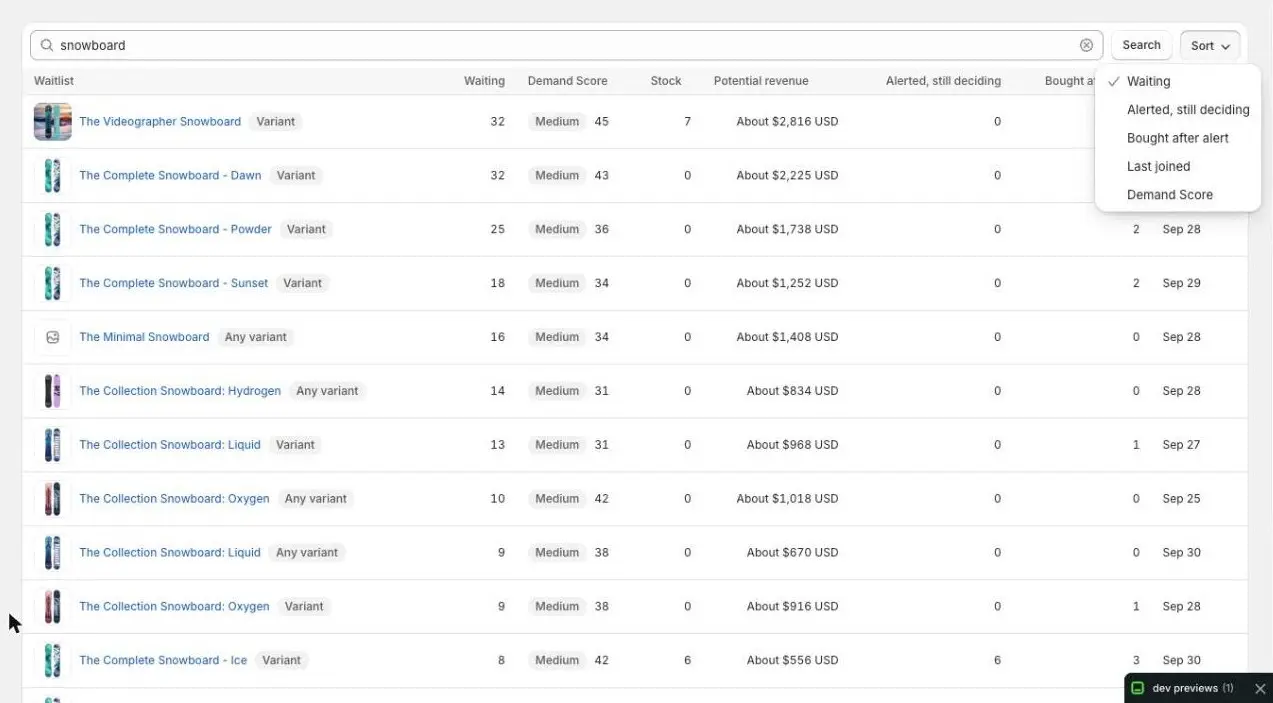
- 1Change the order
- 2Pro: what to restock first
- 6
Page through and open a waitlist
Each page shows 50 waitlists. Use the arrows under the table to move between pages.
Select a product name to open its waitlist and see every shopper on it.
Questions
- Why is the page empty?
- It shows “No demand captured yet” until a shopper presses Notify me. The Waitly block has to be on your product page first. Select Set up the widget to add it.
- Why does my search say only some products were searched?
- A search looks at the first 250 products whose titles match. If you see that note, add more words to narrow it down.
Read next
- See who’s waiting for a productOpen one product’s waitlist, read its totals and cards, and see every shopper on it and what happened to them.
- Plan restocks with Demand ScoreSee which products shoppers want most, what Waitly suggests you do, and roughly how many units to restock.
- Add the Notify me blockPut the Notify me button on your product page from the setup guide, or add it yourself in the theme editor.